WikiHow рассказывает, как построить крышу на своем доме. В статье представлены подробные инструкции и фотографии, которые помогут вам сделать крышу самостоятельно. Узнайте, как выбрать материалы и инструменты для работы, и начните строительство своей идеальной крыши уже сегодня!
Download Article
Download Article
A roof is much more than just the decorative top of a building. A roof provides protection from the elements and precipitation, helps drain water away from a structure, and provides insulation that helps keep the interior of a building warm or cool, depending on the season. There are several types of roofs, but the best one for your needs will depend on the structure, the climate, and the amount and type of precipitation you receive. Regardless of the type of roof you want to build, safety should always be a priority, as roofing work can be dangerous, and fall equipment should always be used.
-
1
Choose your roof style. There are hundreds of roof types out there, and they are all suitable for different purposes and allow for different materials. The two major categories of roof are flat and pitched,[1]
and one of the main things that will determine the actual style of roof you need is the shape of the building. It will be much more difficult to build a round roof onto a square building, for instance, so allow the shape of the structure to guide you. Some of the most common roof styles are: [2]- Gable roof: this looks like an inverted V, and is the easiest and most popular roof style in North America. There are also several variations on the gable roof that are designed for buildings that aren’t simple rectangles, including the saltbox roof, which is suited to join walls that are different heights. [3]
- Flat roof: these roofs are mostly flat, but usually have a bit of a slope. As such, they allow for outdoor living gardens or a living space on top.
- Hip and pyramid roofs: as the name suggests, a pyramid roof is a roof in the shape of a pyramid and is designed for a square building. A hip roof uses the same basic shape, but is elongated and is designed for a rectangular building. The hip roof is also very popular in North America.
- Gambrel roof: this is also known as the barn roof, as this style is often used on barns. This roof style maximizes the amount of usable space in the attic or top floor.
- Shed roof: this is a flat roof style with a greater slope, and is most common on sheds, porches, and home additions.
-
2
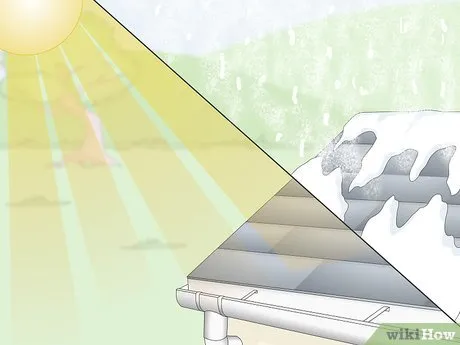
Consider your climate. Different types of roofs are more suitable for certain climates, so it’s important to know a few of these things before deciding what kind of roof to build. Not only should you consider how hot or how cold it gets, but also how much precipitation you receive.
- Gable roofs are not suitable for areas with high winds, while the hip roof is much sturdier in high winds.
- Flat roofs are practical in hot, dry climates, but not areas that receive high amounts of precipitation. [4]
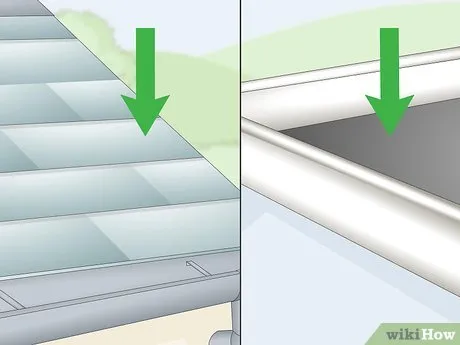
- There are many types of pitched roofs, and these are more suitable for climates that receive more precipitation. The amount of snow and rain you receive will help you determine the actual pitch of the roof.
- In temperate climates that see all four seasons and snow, the simplest pitch roofs are the best, as there are fewer places where leaves and needles can get stuck, and they allow snow and rain to run off easily.
Advertisement
-
3
Choose your materials. There are many types of roofs, and each roof can be made in various ways with different materials. However, some styles are more conducive to certain materials, while other styles don’t allow for specific materials.
- For pitched roofs, the truss (the framework) can be made of wood or metal, and the outside can have wood or asphalt shingles, clay or concrete tiles, or metal sheeting.[5]
The type of truss you build will be suited for different weights, which may help you determine the exterior materials you use. - For flat roofs, you can use asphalt, metal, fiberglass, or poly-vinyl as the exterior, but shingles won’t work.
- Algae-resistant asphalt shingles are suitable for humid climates, while clay tiles are popular in arid climates. Areas that receive heavy snowfall must have strong roofs built with durable materials, and metal or asphalt shingles are the most common exterior materials.[6]
- For pitched roofs, the truss (the framework) can be made of wood or metal, and the outside can have wood or asphalt shingles, clay or concrete tiles, or metal sheeting.[5]
-
4
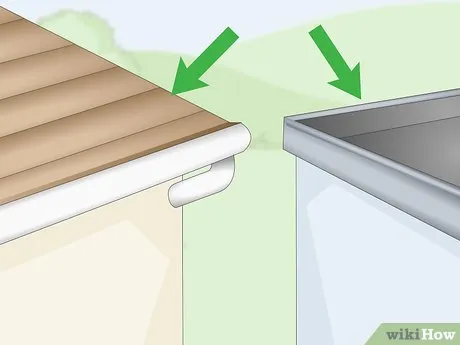
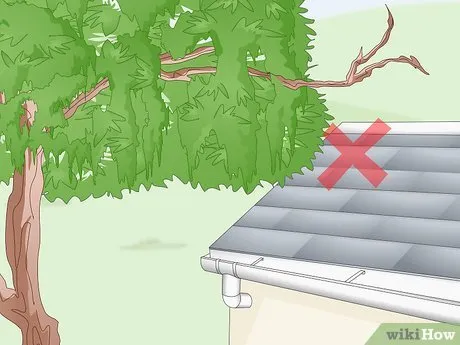
Consider the location. Building a roof under an old tree may not be ideal if any heavy branches are liable to come down on it. Drainage is another thing to consider, because roofs should be equipped with a way to drain precipitation, and you don’t want the run-off running right into your yard or a neighbor’s yard. If you live in a neighborhood where the houses are built close together, you might need to build a roof with a smaller eave than you would otherwise.


Advertisement
-

1
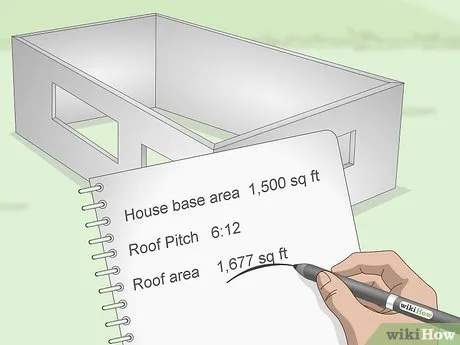
Determine your pitch. The pitch of a roof is the rise—the vertical angle of the roof—over the run (the horizontal measurement). Pitch ratios range from 2:12 to 12:12. A low-pitched roof would be 2:12, and it means that over the space of 12 inches, the roof only rises two inches. You can still walk on a 5:12 roof, which means the roof rises five inches over every 12 inches. The steepest pitch for a roof is 12:12, which creates a 45-degree angle, and where the roof vertically rises 12 inches for every 12 inches it goes horizontally.[7]
-
2
Measure your roof.[8]
To determine material quantities, you need to do some calculations. Accuracy is key here, because miscalculations could lead to major overspending. The best way is to use a roofing calculator that can help you determine the area you’ll be working with and the material quantities you’ll need. -
3
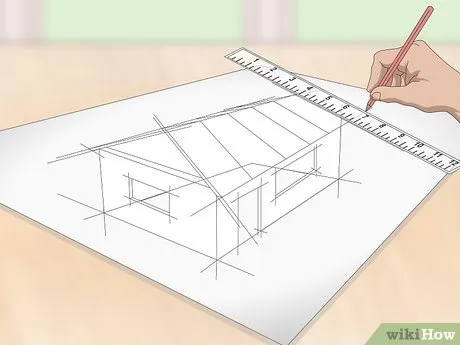
Create a plan. The plan should consist of a diagram of your roof that includes the style and shape, all the measurements, materials, and truss spacing.
-
4
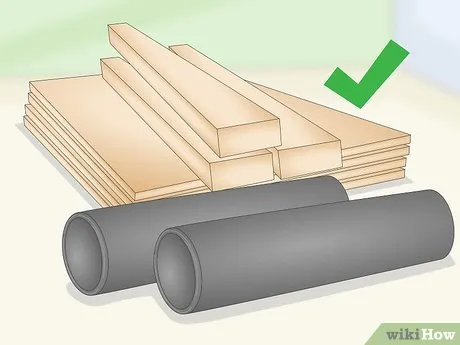
Purchase materials. Once you’ve decided on the pitch for your roof and measured the area, you can purchase your materials. Prefabricated trusses are the quickest and easiest way to create a roof frame, and most new roofs today are built this way.[9]
Each roof truss has the rafters and ceiling joist built in. Allow two to three weeks lead time when you order trusses. Materials you may need to build a basic gable roof include:[10]- Prefabricated trusses
- Sheathing (also known as decking) material, such as plywood or fiberglass
- Underlayment, such as tar paper (and possibly an ice barrier in colder climates)
- Roof covering, such as tiles, shingles, or metal
- Roofing nails


Advertisement
-
1
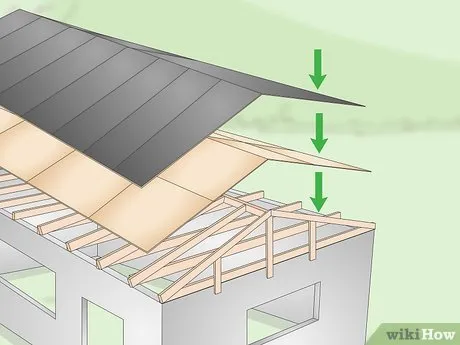
Understand the steps involved. Once you’ve chosen your style, design, and materials, it’s time to actually build your roof. The process can be broken down into four main steps, and they are:
- Framing: this is the construction and installation of the roof frame, which can be done with premade trusses.
- Sheathing: this is the layer of material that goes on top of the frame and provides the surface of the roof.
- Underlayment installation: this is a protective layer that covers the sheathing. This step may also include the installation of an ice barrier on top of the underlayment.
- Roof cover installation: this layer goes on top of the underlayment and protects the roof from the elements.
-
2
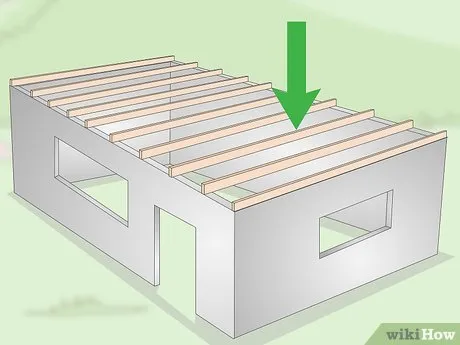
Mount the trusses. To complete this step, the wall frames of the building must already be level, plumb, and square. Use ladders or scaffolding if you are building the roof onto a building that is still a frame. Hoist the trusses onto the roof. This can be done either with many pairs of hands, or with the assistance of a crane.
- Trusses are often spaced 12, 16, or 24 inches apart.[11]
Your spacing will depend on building codes and how much weight (snow) the roof will have to hold. - Without a crane, it will be easiest to hoist the trusses up onto the roof lying flat, and once there they can be raised into position.
- Trusses are often spaced 12, 16, or 24 inches apart.[11]
-
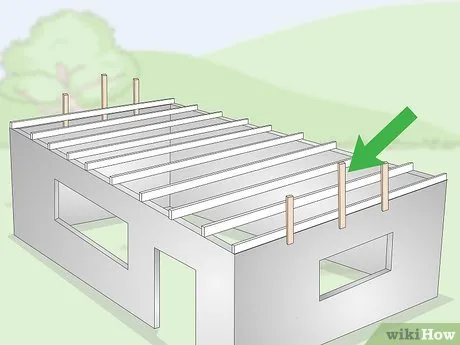
3
Install temporary braces. Before you can install the trusses, you will need to install temporary braces that the trusses can rest on until the sheathing and permanent bracing are installed. At the center of the back wall, nail the bottom half of one two-by-six board that’s 16 feet long to the top of the outside wall, making sure you fasten it to a stud. The top half of the brace should extend over the top of the roof so it can be fastened to the first truss. Nail another two-by-six brace of the same length six feet to the left of this center brace, and a third brace six feet to the right of the center brace.[12]
Repeat the same steps to install three temporary braces at the front of the building. -
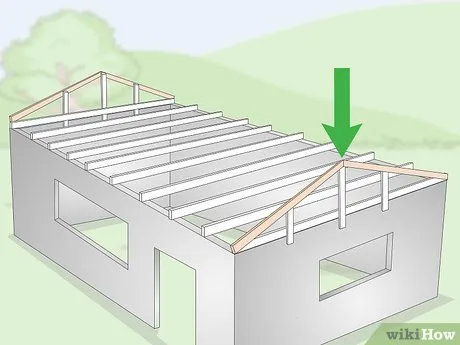
4
Install the end trusses. Install the two end trusses at the front and back of the building according to the manufacturer’s instructions, making sure you affix them to the temporary bracing.[13]
Take a batten that is slightly longer than the distance that will separate your trusses. Nail the batten to the end truss (at the back of the building) so that it juts out in a perpendicular fashion toward the front of the building. This will be affixed to the next truss as a temporary bracing. -
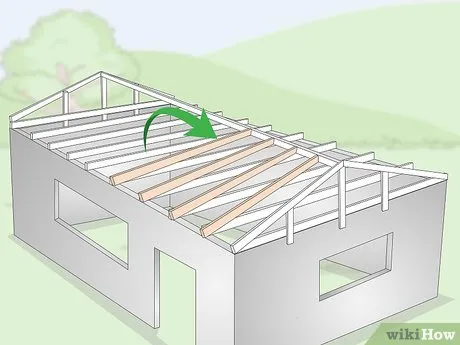
5
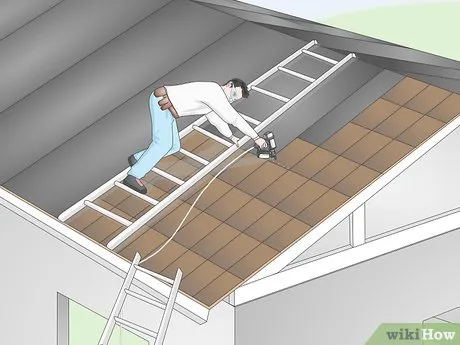
Install the standard trusses. Working toward the front of the building, install the first standard truss according to the manufacturer’s instructions. Nail it to the batten from the first truss as well. Take a new batten, one that’s long enough to attach to four properly spaced trusses, and nail this to the end truss and the first standard truss.
- Continue installing the common or standard trusses at regular intervals, depending on your plan. As you reach the end of the batten, install progressively longer batten ties (going by four or so truss lengths), until you can install a batten that spans the length of the roof from one end truss to the other.
- Some areas have building codes that dictate a roofing system must be attached to the structure below with steel connector plates or hurricane clips, so be sure you’re building your roof to code.
- Once all the trusses are installed, install permanent bracing as per the truss manufacturer’s instructions.[14]
-
6
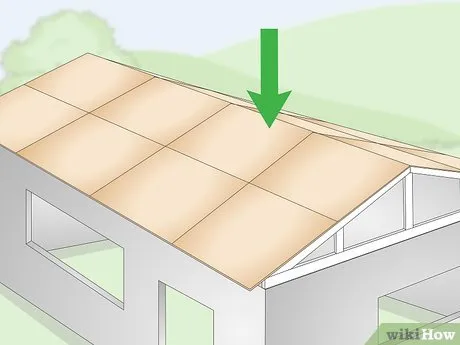
Sheath the roof. Once your trusses are anchored and permanently braced, you can begin sheathing the roof. Sheathing is installed lengthwise, starting at the bottom corner, and moving across the bottom first. When you move up to the next row, begin at the same end with a half sheet of sheathing, so that your sheathing is staggered. Always join panels over supports, and ensure that panels are one-eighth of an inch apart. Repeat for both sides of the roof.
- To fasten the sheathing to the frame, use 8D common or deformed shank nails. Fasteners should be three-eighths of an inch from the edges. Fasteners should be spaced six inches apart around the edges of each panel, and 12 inches apart within each panel.[15]
-
7
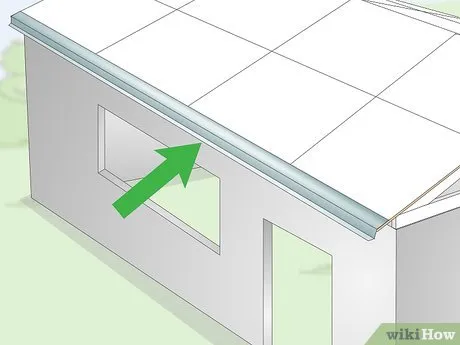
Install the drip edge. This is metal flashing that will protect the bottom of the sheathing from rain and direct it into a gutter or away from the house.[16]
-
8
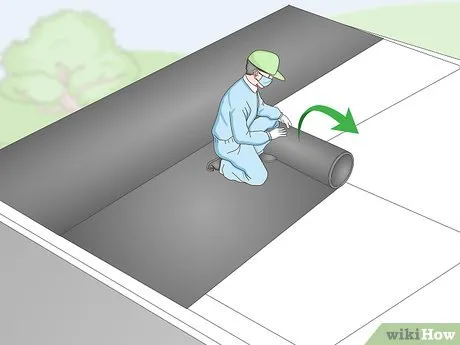
Install the underlayment. The most common underlayment is roofing felt, which is similar to tar paper, but felt uses asphalt instead of tar. The main purpose of the underlayment is waterproofing.
- Beginning at the bottom where you started with the sheathing, roll the underlayment out flat, going lengthwise across the sheathing. Staple it into place.
- Once the first layer is down, roll out the next layer, working your way up toward the roof ridge. Overlap the layers by about six inches.
- Continue laying the underlayment up to the ridge, or within four inches of the ridge.
- Repeat the same process for the other side of the roof.
- Once you’ve laid the underlayment on both sides, roll out a final layer to go over the ridge like a hat. Make sure this layer overlaps the underlayment on either side of the ridge by at least eight inches.[17]
-
9
Install the roof cover. Like the sheathing and underlayment, the roof cover is installed lengthwise from the bottom up. Like sheathing, shingles should be staggered, and like underlayment, they should also overlap. Work your way up to the ridge on either side, and finish the ridge with ridge cap shingles.


Advertisement
-
Question
How do I make a roof plan?

David Bitan
Roofing Contractor & Maintenance Professional
David Bitan is a roofing professional, licensed contractor, and the owner and founder of Bumble Roofing based in Southern California. With over 12 years of construction industry experience, David specializes in restoring, repairing, and maintaining residential, commercial, and industrial roofs. With over 60 years of combined experience, Bumble Roofing provides easy, friendly services to structures including residential, commercial, industrial, multi-family, and government buildings along with hospitals, hotels, and churches.
Roofing Contractor & Maintenance Professional
Expert Answer
Ask a Question
200 characters left
Include your email address to get a message when this question is answered.
Advertisement
-
Always adhere to all local building codes, and ensure you have the proper permits before you begin construction.
-
Always wear proper fall equipment.
Advertisement
References
About This Article
To build a roof, start by deciding whether you want to put up a flat or pitched roof on your building. Next, measure the area and make calculations so you know how much of your chosen materials to buy. Purchase your materials, including prefabricated trusses, plywood covering, and roof tiles. To begin construction, install the trusses, starting with the end trusses. Then, sheathe the roof with wood, install the underlay, and finish by adding the tiles. For tips on what to consider when deciding which type of roof to build, including your climate and roofing materials, keep reading!
Did this summary help you?
Thanks to all authors for creating a page that has been read 242,396 times.
Reader Success Stories
-
MIke Watkinson
Jun 3, 2017
"I used another article ‘how to build a playhouse’ and wanted a little more information on how to make the rafters…" more
Did this article help you?
Как построить беседку в Minecraft?
Построить беседку в Minecraft довольно просто, и вот некоторые шаги, которые могут помочь:
Шаг 1: Выберите место для постройки
Выберите место для постройки беседки. Хорошим выбором может быть плоская зона в лесу или на берегу озера. Убедитесь, что выбранное место достаточно большое для того, чтобы вместить беседку.
Шаг 2: Соберите материалы
Соберите материалы для постройки беседки. Материалы, которые вы выберете, будут зависеть от того, как вы хотите, чтобы выглядела ваша беседка. Некоторые популярные варианты включают дерево, камень или кирпичи.
Шаг 3: Начните строительство
Начните строительство, создавая основание для беседки. Это может быть просто равная земля, или вы можете использовать блоки, чтобы создать более прочное основание.
Шаг 4: Создайте каркас беседки
Создайте каркас беседки, используя выбранные вами материалы. Каркас может быть простым квадратом или прямоугольником, или у вас может быть более сложная форма, если вы хотите, чтобы ваша беседка выглядела более уникальной.
Шаг 5: Поставьте крышу
Поставьте крышу на свою беседку. Крыша может быть скатной или плоской, в зависимости от того, какой стиль вы выбрали.
Шаг 6: Добавьте детали
Добавьте детали, чтобы сделать вашу беседку более уютной. Это может быть что угодно, от стульев и столов до цветов и растений. Используйте свою фантазию и творческий подход, чтобы создать уникальную беседку.
Шаг 7: Закончите работу
Закончите работу над беседкой, проверив, что она полностью завершена и отвечает вашим требованиям.
Это не полный список шагов, но я надеюсь, что он дал вам представление о том, как построить беседку в Minecraft.