Как сделать обрамление для зеркала: 3 способа — wikiHow» — в статье рассказывается о трех различных способах создания обрамления для зеркала, включая использование декоративных рамок, молдингов и деревянных планок. Это полезная информация для тех, кто хочет добавить стиль и индивидуальность своему интерьеру.
Download Article
Download Article
When you want to dress up a mirror by framing it, there are a couple of easy ways to do it. The first is building your own frame around the mirror using baseboard molding, which requires a little bit of carpentry. The other way you can do it is to just repurpose a picture frame and put a matching mirror inside of it. Either way, you’ll soon have a much more interesting mirror to bring life to your home!
-
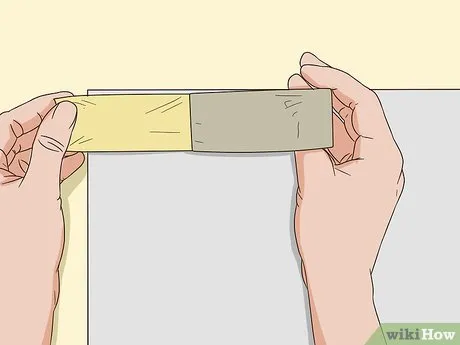
1
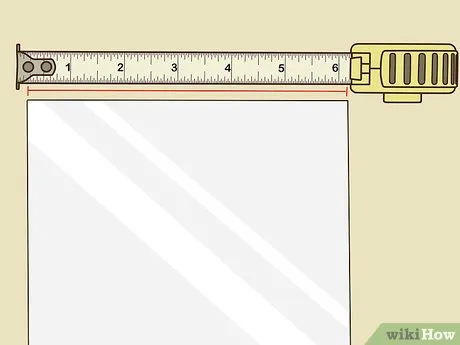
Use a tape measure to measure the mirror you want to frame. Measure the height and write it down. Measure the width and write it down next. You will use these measurements to determine how long to cut the baseboards for the frame.[1]
- This method works for framing basic mirrors that don’t have any kind of rim or frames around them already. These types of mirrors are also known as floating mirrors or construction-ready mirrors.
- You can use this method to put a frame around a mirror that is already attached to a wall, or to frame a mirror before hanging it.
- The mirror needs to have straight edges to build a frame around it with baseboards.
-
2
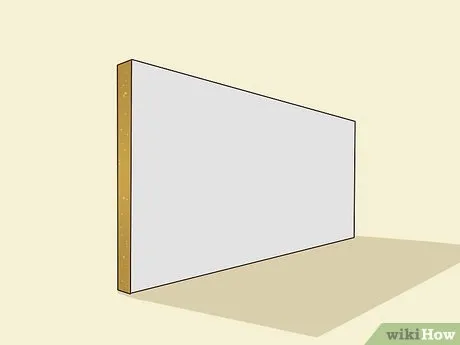
Purchase primed MDF baseboards to make the frame with. Go to a home improvement center and select the style of baseboards that you want. Purchase a sufficient length of baseboard to surround the mirror according to the measurements you took.[2]
- Primed MDF baseboards are easy to paint so you can make them any color you want for the frame.
Tip: You can also use natural wood baseboards or any other style to get the look you want.
Advertisement
-
3
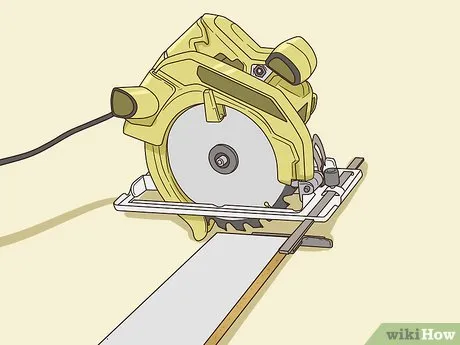
Cut the baseboards to length with a miter saw. Measure and mark your baseboards to the lengths you need for the sides, top, and bottom. Place the baseboards in a miter box and cut them straight to the lengths that you need.[3]
- For example, if your mirror is 2 ft (0.61 m) wide by 3 ft (0.91 m) tall, then you need 2 baseboards that are 2 ft (0.61 m) long and 2 that are 3 ft (0.91 m) long.
-

4
Cut the corners of the baseboards to a 45-degree angle with a miter saw. Change the angle on the miter box to 45 degrees. Cut in from the corners of each board at a 45-degree angle down towards the inside edge of each board.[4]
- This will make the frame fit nicely together in each corner.
-
5
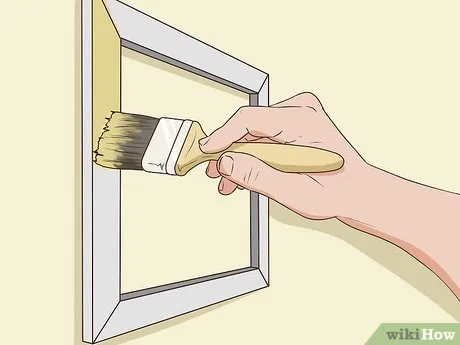
Paint the baseboards a color of your choice or leave them as is. Use a paintbrush to coat both the front and back of the baseboards (if you want to paint them). Leave them as is if you are fine with the color they came in (such as natural wood).[5]
- It’s important to paint the backs the same color as well because they can reflect in the mirror.
-
6
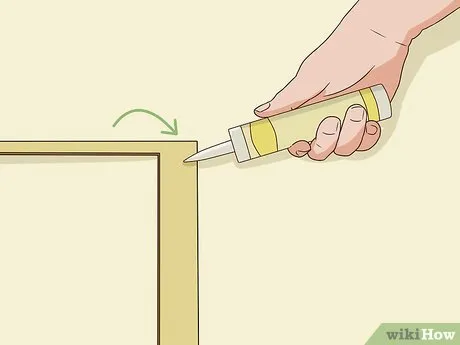
Install the baseboards around the mirror using liquid nails. Squeeze a zig-zag line of liquid nails along the back of the baseboards with a caulk gun. Start with the bottom board, then the sides, then the top and stick them to the mirror one-by-one.[6]
- Liquid nails are an adhesive form of caulking.
- Avoid placing the liquid nails too close to the inside edges of the baseboards, or it can squeeze out and get on the mirror when you stick the boards on.
-
7
Secure the baseboards with painter’s tape or lay the mirror on the ground. Tape all the baseboards to the wall with painter’s tape if you attached them to a mirror that is already hanging. Lay the mirror flat on the ground while the frame dries if the mirror isn’t already hanging.[7]
- Painter’s tape is the blue masking tape that painters use to cover things up that they don’t want to get paint on.
-
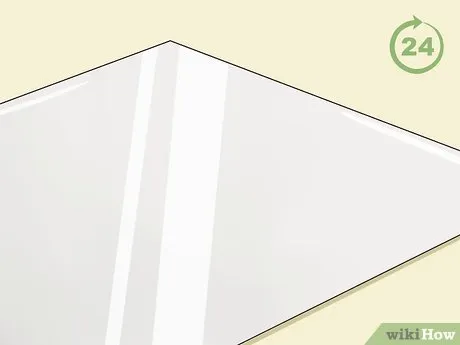
8
Let the frame dry completely for 24 hours. Liquid nails need 24 hours to set before you can apply any stress to the frame. Remove the painter’s tape after 24 hours if you used it to secure the frame in place on a hanging mirror.[8]
- Liquid nails can take a full week to completely cure for maximum strength, but you will be able to safely touch the newly-framed mirror after 24 hours.
-
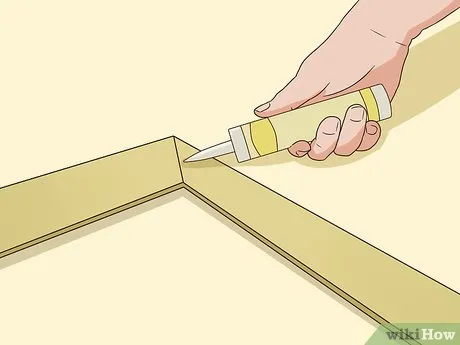
9
Fill any gaps in the corners with caulk and paint over it. Use a caulk gun to squeeze a thin line of caulk into any gaps. Smooth it over with your fingers, then paint over it to match the rest of the frame.[9]
- This applies only if you used MDF baseboards and painted them. If you used natural wood boards, you will need to do this part with wood filler instead.


Advertisement
-
1
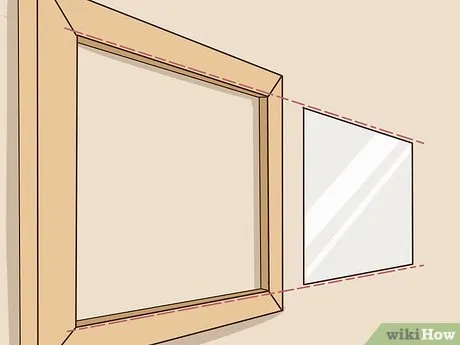
Find a mirror and frame that match in size. The mirror needs to be the same size as the glass that goes in the picture frame (if it has any). This is easiest to do with square or rectangular mirrors.[10]
- If you can’t find a frame and mirror that fit together, then you can have a mirror custom cut to fit a frame you want to use. You can also have a frame custom built to fit a mirror that you already have.
Tip: This is a great way to repurpose antique frames or give new life to old, boring mirrors.
-

2
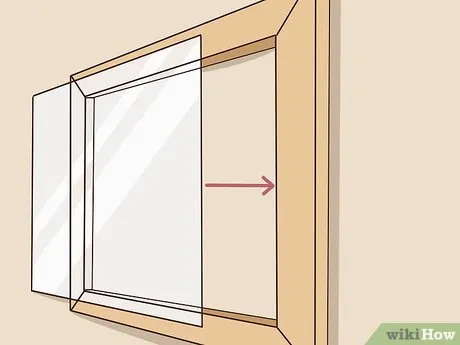
Remove the frame glass from the frame if there is any. Remove the frame’s backing that holds the glass in place and set everything aside so you just have the frame. You don’t want glass in front of a reflective mirror.[11]
- You might be able to use the backing to secure the mirror in place, but you can recycle or save the glass for something else.
-
3
Attach the mirror to the back of the frame using silicone. Put a thin bead of silicone around the edge of the mirror or inside lip of the frame. Carefully align the mirror to the back and press it into place.[12]
- If the picture frame has a backing material, you could also attach the mirror to that instead and use it to secure the mirror inside the frame. Just make sure it all fits together in place before you start using silicone to attach the mirror to the backing.
- Once the mirror is secured to the frame, there are lots of ways you can decorate it, like by putting stencils on the glass of the mirror, or even gluing things like fabric or shells around the frame.
-

4
Test the weight to make sure the hanging mechanism is strong enough. A mirror is heavier than a picture. Check by lifting up the mirror and frame slightly off the ground by its hanging mechanism (the wire or the hooks) to make sure it’s strong enough to support the weight before you hang it to a wall.[13]
- If the frame doesn’t already have a hanging mechanism, or the existing one isn’t strong enough, then you will have to hang it yourself.
Expert Answer
What is a good height to hang a wall mirror?
Peter Salerno is the owner of Hook it Up Installation, a professional installation company, which has been hanging art and other objects around Chicago, Illinois for over 10 years. Peter also has over 20 years of experience installing art and other mountable objects in residential, commercial, healthcare and hospitality contexts.
EXPERT ADVICE
Usually about 8-12 inches off of the floor. A good rule of thumb is that you want to be able to see your shoes when you’re standing in front of the mirror.


Advertisement
-

1
Frame a mirror in a reclaimed wood door or window for a rustic frame. Mount pieces of mirror instead of the glass in an old, rustic-looking door or window frame. Get the mirror pieces custom-cut to the dimensions you need by a mirror and glass company. Mount the mirror with silicone adhesive.[14]
- Make sure to remove any old glass pieces from the door or window before you mount the mirror pieces.
-
2
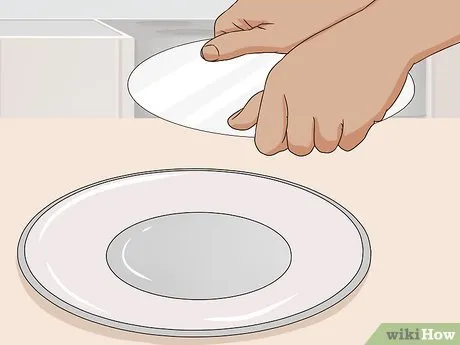
Mount a mirror inside a vintage platter or tray for a unique mirror frame. Use silicone adhesive to attach a mirror inside of the tray or dish. Things like old cake pans or serving platters work well.[15]
- You can go thrift shopping for cheap, vintage platters and dishes, then get a mirror custom-cut to fit perfectly.
-
3
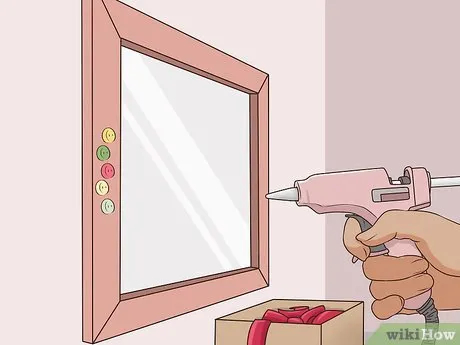
Glue anything you want around a plain mirror frame to decorate it. Use a hot glue gun to glue shells, sticks, ribbon, or anything else you can dream up around a regular old mirror frame to give it a new life. Let your imagination run wild![16]
- You could even glue tiles around a mirror to make a mosaic frame.


Advertisement
-
Question
Can I hang a mirror without a frame?

Peter Salerno is the owner of Hook it Up Installation, a professional installation company, which has been hanging art and other objects around Chicago, Illinois for over 10 years. Peter also has over 20 years of experience installing art and other mountable objects in residential, commercial, healthcare and hospitality contexts.
Installation Expert
Expert Answer
Support wikiHow by
unlocking this expert answer.Yes, there are all kinds of different solutions for that. There are mirror clips you can put on the mirror and then hang on the wall. There are also track systems you can use. There’s also some really cool floating hardware that will basically float the mirror out from the wall.
-
Question
I am making a hand-built frame for a mirror. How do I attach a mirror from the backside of the frame?
The frame is rabbited or morticed out to receive the mirror and a wood or cardboard backing, then held in by small nails or staples.
-
Question
I am making a seven-foot tall mirror wall that will fold open and close to hide a door. What is the best way to do this? When I open the mirror I want to hide door but still be able to open it.
Your handle could be on the frame. If you already have a door, take the handle off and put the mirror on, drill a small hole in the frame and put the handle through. A discreet handle will help hide the door.
See more answers
Ask a Question
200 characters left
Include your email address to get a message when this question is answered.
Advertisement
Things You’ll Need
- Mirror
- Primed MDF baseboards
- Miter saw
- Tape measure
- Pencil
- Caulk
- Paint
- Paintbrush
- Liquid nails
- Caulk gun
- Level
- Painter’s tape
- Mirror
- Picture frame
- Silicone
- Mirror
- Silicone
- Reclaimed wood door or window frame
- Platter or dish
- Hot glue gun
- Decorative items
References
About This Article
To create a simple frame for a mirror, try using baseboards. Measure the mirror before you begin so you know what length to cut the boards. You can use natural wood or choose an engineered wood, like MDF, for an easy-to-paint option. You’ll also need a miter saw to cut the baseboards and angle the corners. If you want to paint your frame, do it before attaching the baseboards to the mirror so you don’t get paint on the glass. When you’re ready, you’ll want to attach the baseboard frame with a heavy-duty construction adhesive. Make sure to give the adhesive at least 24 hours to cure before you mount the mirror. For tips on how to frame a mirror with a picture frame, keep reading!
Did this summary help you?
Thanks to all authors for creating a page that has been read 181,737 times.
Did this article help you?
Как сделать садовые дорожки своими руками?
Садовые дорожки — это отличное дополнение к любому саду или участку. Вот несколько шагов, которые помогут вам сделать садовые дорожки своими руками:
-
Определите местоположение: Решите, где вы хотите разместить дорожки. Это может быть прямой путь от дома до ворот или извилистая дорожка через сад. Определите ширину дорожки в зависимости от назначения: если это только для пешеходов, то достаточно 50-60 см, если для проезда садовой техники, то не менее 1 м.
-
Отметьте границы: Используя веревку и колышки, отметьте границы дорожки.
-
Удалите траву и землю: Используя лопату или экскаватор, удалите верхний слой травы и почвы на глубину около 20 см.
-
Подготовьте основание: Налейте щебень или щебеночно-гравийную смесь на дно котлована, затем уплотните его виброплитой.
-
Налейте бетон: Налейте бетон на основание, убедившись, что он распределен равномерно и на нужную глубину. Используйте штангу для выравнивания бетона.
-
Декорируйте: Если вы хотите, чтобы ваша дорожка имела декоративный вид, то на этом этапе можно внести различные элементы: вставить в бетон камни, ракушки, монеты или другие декоративные предметы.
-
Оставьте на время высыхать: Оставьте дорожку на несколько дней, чтобы бетон полностью высох.
-
Установите обрамление: Установите кромку дорожки, например, из камня или бетонного блока, чтобы предотвратить разрушение.
-
Засыпьте гравий или песок: Насыпьте слой гравия или песка на дорожку и разровняйте его. Это поможет предотвратить смещение плиток и улучшит дренаж.
-
Установите покрытие: Наконец, установите покрытие — кирпичи, плитку, камни или другие материалы на гравийном слое. Убедитесь, что они тщательно закреплены.
В зависимости от вашего уровня опы
Шаг 4: Постройте форму для бетона
Для того чтобы сделать форму для бетона, нужно сделать опалубку. Опалубка — это конструкция из досок, в которой заливается бетон. Размер и форма опалубки зависят от того, какой формы должна быть дорожка. Для начала, нужно измерить длину и ширину дорожки и нарисовать ее на земле. Затем, используя доски и крепежные материалы, постройте раму опалубки. При постройке опалубки не забудьте про входные и выходные ступеньки. Также нужно убедиться, что рама установлена ровно и на нужной глубине.
Шаг 5: Залейте бетон
Перед заливкой бетона, убедитесь, что опалубка установлена ровно и на нужной глубине. Затем, с помощью бетононасоса или ведра, заливайте бетон в опалубку. При заливке бетона нужно контролировать его уровень и распределение по опалубке. После заливки, ровняйте поверхность бетона и оставьте его высыхать.
Шаг 6: Установите кромки
После того, как бетон высохнет, установите кромки вдоль дорожки. Кромки нужны для того, чтобы предотвратить расширение дорожки во время морозов и для улучшения внешнего вида дорожки. Кромки можно установить из камня, бетона или пластика. Установите кромки вдоль всей дорожки, используя крепежные материалы и клей.
Шаг 7: Покройте дорожку защитным покрытием
После того, как кромки установлены, нужно покрыть дорожку защитным покрытием. Защитное покрытие защитит дорожку от разрушения и пятен, а также улучшит ее внешний вид. Для этого можно использовать специальные краски и лаки, которые подходят для бетона.
Таким образом, сделать садовую дорожку своими руками не так сложно. Важно правильно подготовить место под дорожку, построить форму для бетона, заливать бетон и установить кромки и защитное покрытие.